This pertains to Linux Mint 18 . Most likely it will work for slightly older versions as well. It is assumed that Java has already been installed on the system and is either Java 8 or 9 or later.
1.Create a user group
sudo groupadd tomcat
2.Add a user to the above group and set the user home to the folder where tomcat will be installed. Prevent this user from having a shell to log in to.
sudo useradd -s /bin/false -g tomcat -d /opt/tomcat tomcat3.Install tomcat from the official downloads page. We are downloading version 9 from https://tomcat.apache.org/download-90.cgi . In this page, under Binary Distributions – Core, download the tar.gz file
4.Change directory to where you have downloaded the tar.gz file eg. cd ~/Downloads . We are going to create the tomcat folder and then unzip the file contents into that folder.
sudo mkdir /opt/tomcat
sudo tar xzvf apache-tomcat-8*tar.gz -C /opt/tomcat --strip-components=1
5.Give the tomcat group ownership of the tomcat folder tree
sudo chgrp -R tomcat /opt/tomcat6.Give read access to the conf tree and execute access to the conf folder
sudo chmod -R g+r confsudo chmod g+x conf6.Give ownership to the main folders to the tomcat user
sudo chown -R tomcat webapps/ work/ temp/ logs/
7.Find the path to the installation of Java.
echo $JAVA_HOME
8.Set tomcat to run as a system service by creating a .service file for it
sudo vi /etc/systemd/system/tomcat.service9.Put in the contents below and set the JAVA_HOME path as required. Remember to keep the /jre at the end of the path.
[Unit]
Description=Apache Tomcat Web Application Container
After=network.target

[Service]
Type=forking

Environment=JAVA_HOME=/usr/lib/jvm/java-8-oracle/jre
Environment=CATALINA_PID=/opt/tomcat/temp/tomcat.pid
Environment=CATALINA_HOME=/opt/tomcat
Environment=CATALINA_BASE=/opt/tomcat
Environment='CATALINA_OPTS=-Xms512M -Xmx1024M -server -XX:+UseParallelGC'
Environment='JAVA_OPTS=-Djava.awt.headless=true -Djava.security.egd=file:/dev/./urandom'

ExecStart=/opt/tomcat/bin/startup.sh
ExecStop=/opt/tomcat/bin/shutdown.sh

User=tomcat
Group=tomcat
UMask=0007
RestartSec=10
Restart=always

[Install]
WantedBy=multi-user.target
10.After saving the file, reload systemd daemon
sudo systemctl daemon-reload11.Start tomcat
sudo systemctl start tomcat
12.You can check the status by the following command
sudo systemctl status tomcat
13.If you want tomcat to start automatically at boot then put the following command
sudo systemctl enable tomcat14.Setup the default admin credentials for the tomcat web interface by editing the tomcat-users.xml file
sudo vi /opt/tomcat/conf/tomcat-users.xml
15.Set your root credentials as desired and save the file
<tomcat-users . . .>
    <user username="root" password="master" roles="manager-gui,admin-gui"/>
</tomcat-users>
15.Tomcat should be ready to run now. Type http://localhost:8080 in your browser. You should see the following screen:

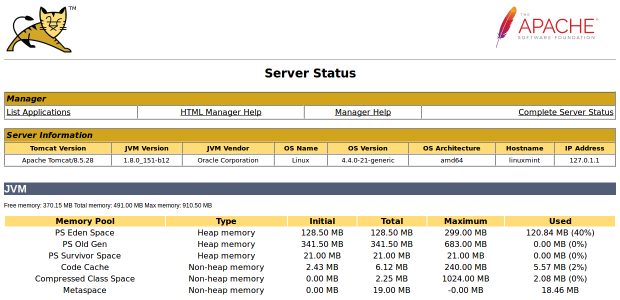
16.If you click on any of the buttons like Server Status or Host Manager it will ask you for admin credentials which are the ones you set in tomcat-users.xml file. Once you have logged in it will show something like this:
17.You can stop the tomcat service by
sudo systemctl stop tomcat
Leave a Reply